![]()
Shading regions is a great new addition to FX Draw's tool set but you need to remember that it is different to the normal "floodfill" that you might find in a painting program.
Video - Filling Regions Part 1
Video - Filling Regions Part 2
Video - Filling Regions Part 3
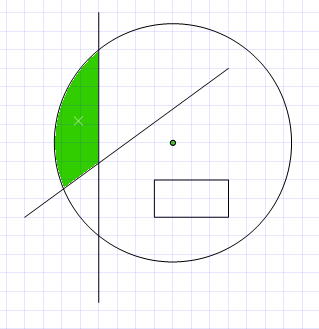
To shade region, select the shade region tool and click once in the region to be shaded.
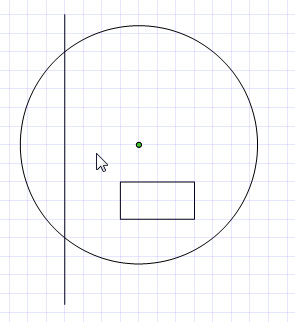
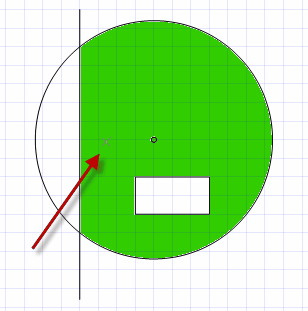
Notice that a light cross is drawn where you clicked.
Shading Is Attached to A Click
The first difference between FX Draw and a normal paint program is that the shading is an "object" that can be selected and moved. Selecting a shaded region is a little difficult because it can only be done in the spot of the original click. The easiest way to click on the light cross

Now that the region is selected, you can delete it, or pick up the green square and move it.
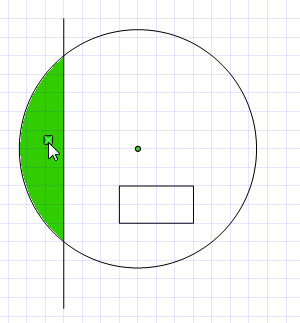
You will see the shading jump to the other side as the square is moved.
The Drawing Order
Another major difference is that the shading is in the "drawing order". So far, the drawing order for this image is
1. Circle
| 2. | Line |
| 3. | Rectangle |
| 4. | Shading |
The shading will shade up to anything that has already been drawn. If we now draw a second line, the drawing order will be
1. Circle
| 2. | Line |
| 3. | Rectangle |
| 4. | Shading |
| 5. | Line |
The shading occurs before the second line is drawn and just ignores it.
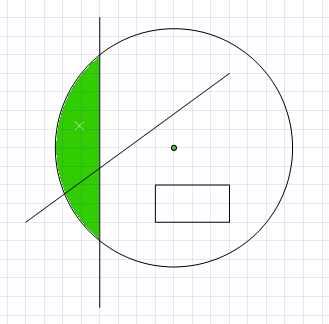
We can change the drawing order using the drawing order toolbar. If we push the "Bring Forward" button, the selected shading will be brought forward in the diagram (drawn later) and the second line will affect the shading.
Drawing Order Video
Changing Colours
Suppose you wish to change the colour of an already shaded region. If you are used to normal, bitmap painting programs you will probably select a new colour and shade again. FX Draw will not let you do this - you can only shade regions which are blank.
To change the colour of your shading, you need to select the existing shading and change its colour.